Collaborate your Project management and customer support efforts using Soffront Collaboration. It’s a collaboration companion that works the way teams do. You can work jointly with your contacts from remote locations or in the same room using Soffront Collaboration. It allows you to chat with your contact, share files setup video meetings and more.
How to use Soffront Collaboration for Customer Support?
Soffront Collaboration is very useful for Customer Support as it allows the Support Representative to work directly with the customer to understand the issue and help resolve it sooner and faster. When a support ticket is created through Portal, Email or Call the Support Representative can review the ticket and click on the Soffront Collaboration icon to initiate a chat with the customer, which will allow the Support representative to gather more information on the issue, share related articles or setup a web session to help the customer resolve the issue. All the notes , attachments and files from the collaboration session can be saved to the CRM.
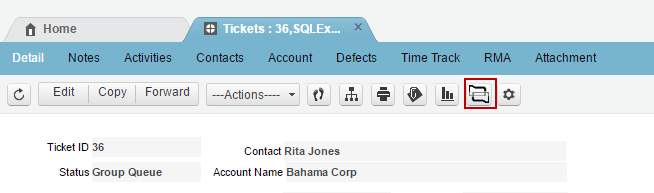
Follow the steps below to open Collaboration from Tickets.
- Open a Ticket.
- Click on the Chat icon to open collaboration.
3. On this page you can find three collaboration option to contact the customer:
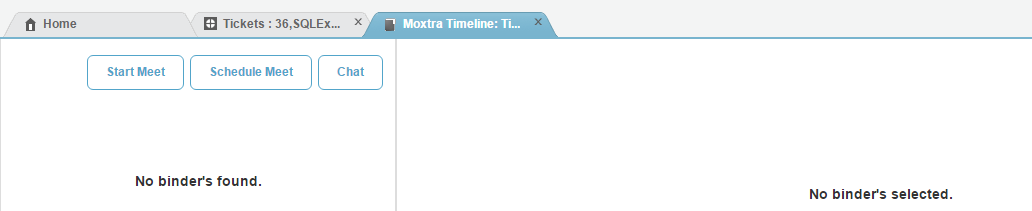
- Start Meet: Meet enables you to host real-time meetings and share your desktop screen with participants in real-time.
- Schedule Meet: Schedule a meeting for a later date and time with the customer
- Chat: Chat allows you to exchange text, documents, To- Do list , and start a meet.
Start Meet: Meet enables you to host real-time meetings and share your desktop screen with participants in real-time.
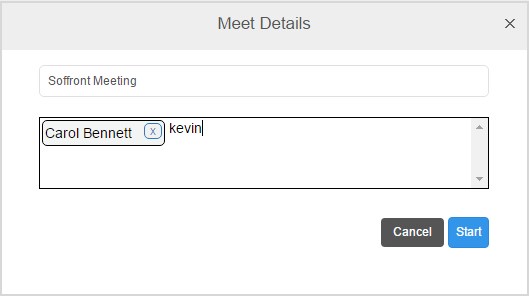
- Click on Start Meet button.
- Type in Meeting Topic
- The customer name is already added, type in contact name or email address to invite another contact to the meeting.
- Click on Start to start the meeting. This will open the collaboration app on your Soffront tab.
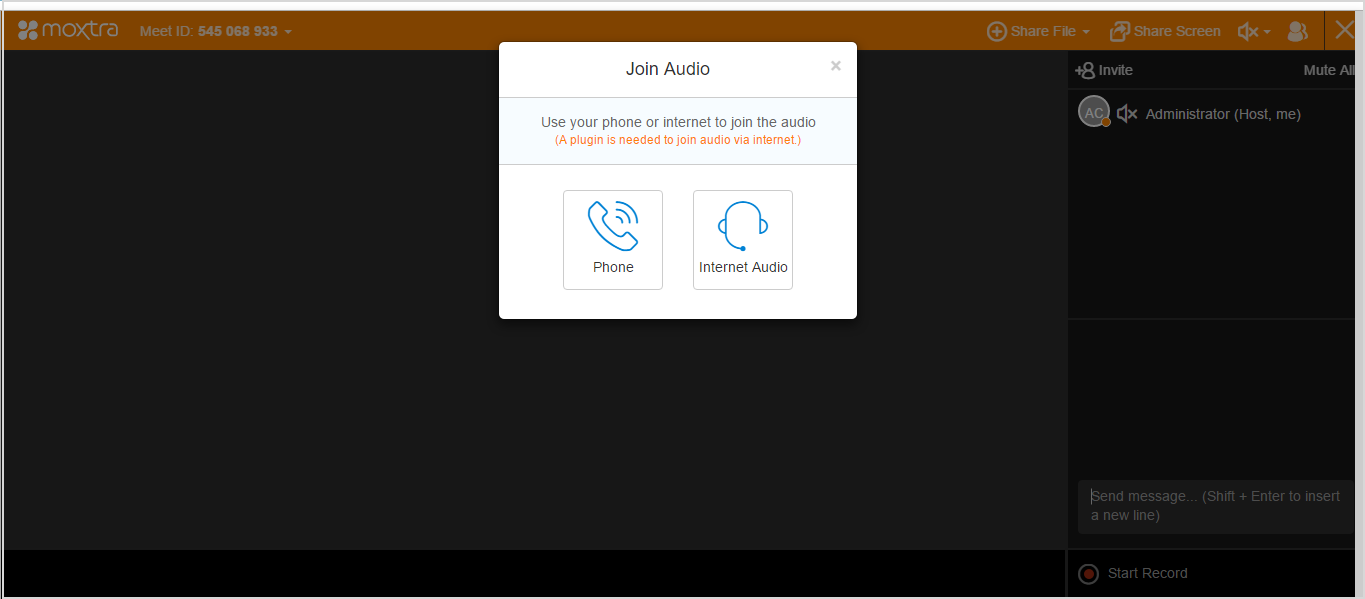
- Select audio option: Speak through phone or Internet Audio.
- Click on
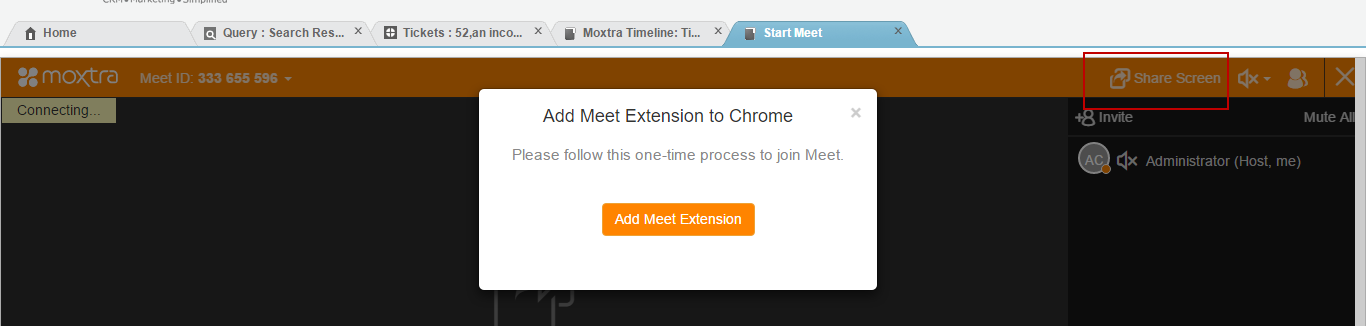
 Share Screen to send out a meeting extension for your browser and share your screen with the customers attending the meeting.
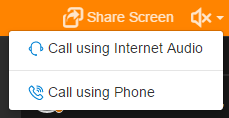
- If you have not already selected audio option , click on
 icon to select from the dropdown.
- Click on
 to invite other contacts to Join the meeting.
 - Use the chat box at the bottom right hand corner to send messages to participants during the meet.
- Click on
 Start record to record your meet.
Schedule Meet: Schedule a meeting for a later date and time with the customer
- Click on Schedule Meet
- Type in Meet Topic
- Add start date and time then add end date and time for the meeting.
- The Account contact is already added, type in contact names to add more participants to the Meet
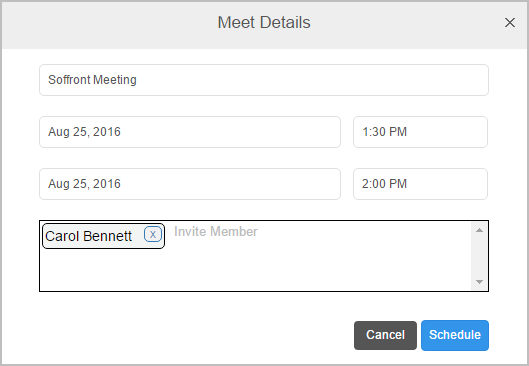
Click on schedule to schedule meet.
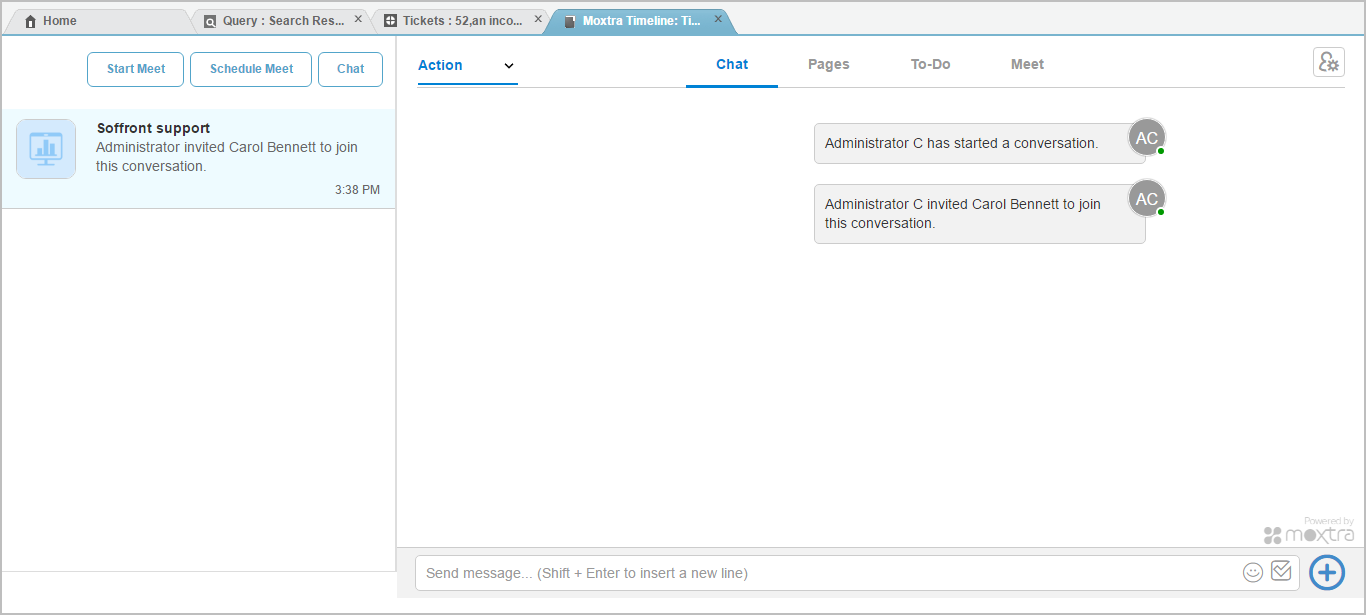
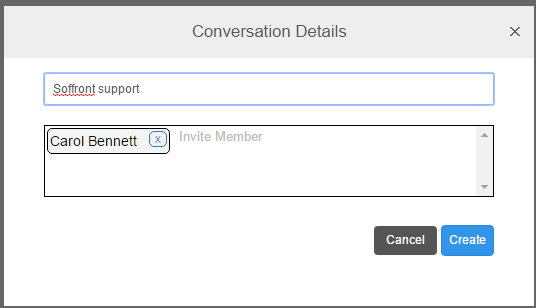
Chat: Chat allows you to exchange text, documents, To- Do list , and start a meet.
- Click on chat button.
- Type in Chat topic.
- The Account contact is already added, type in contact names to add more participants to the chat.
- Click on create to Start chat.
- Chat: Type in the chatbox to communicate with the customer
- Page: Create, add or upload a file with a single click. Create annotations on uploaded files and share with the customer.
- To -Do : Create, organize and assign To-Dos to your team and keep them in one place, so everything is actionable and transparent. Make it super easy to get tasks done with your team.
- Meet: Start a meet with your Customer.