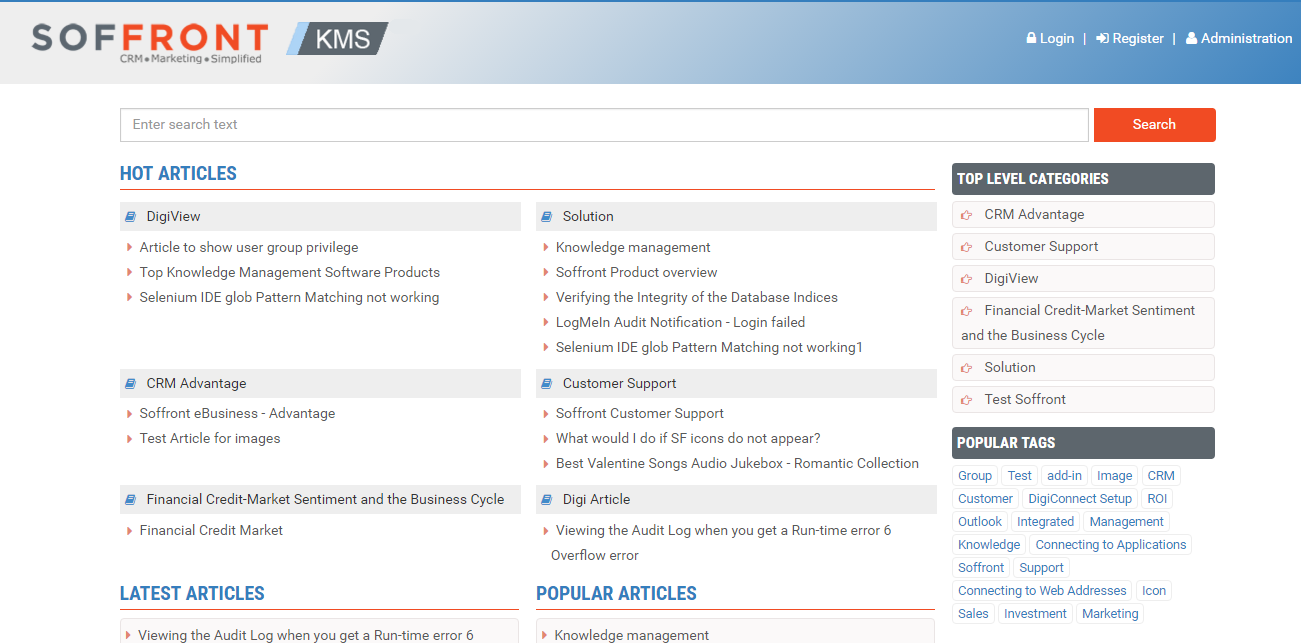
Sofronts new KMS with Contemporary Operating System and user interface is fully integrated with the Soffront Portal and Self help app. It is mobile friendly so you can check the KMS on the go on your smartphone or mobile device.
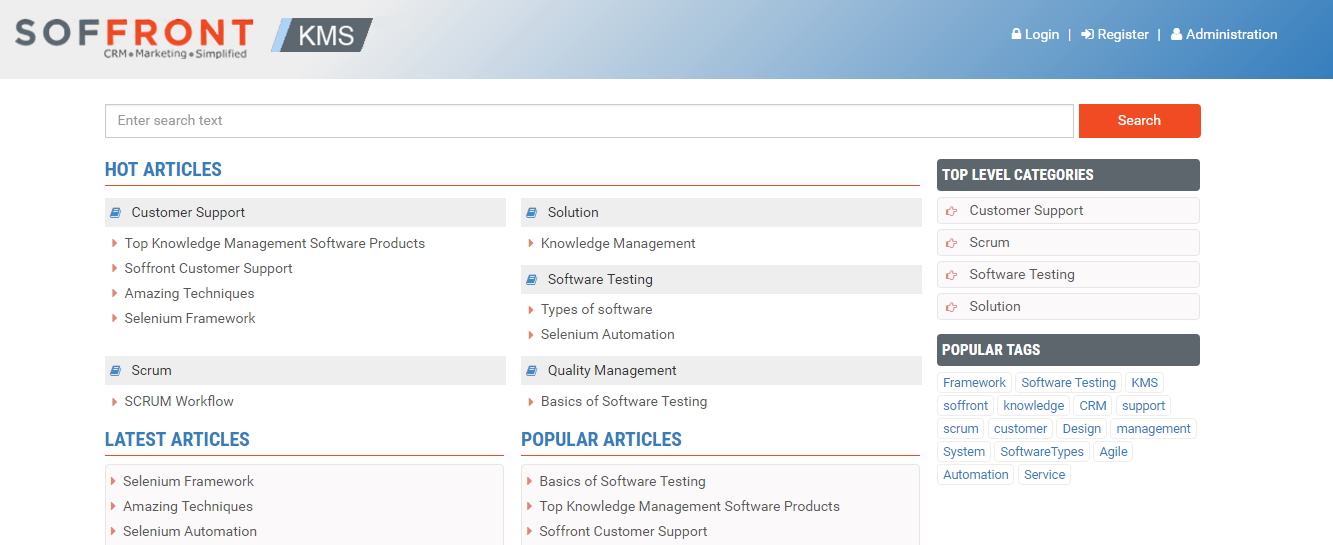
It is a centralized repository for information which can be used internally by the organisation. Knowledge base can give customers easy access to information that would otherwise require contact with organization’s staff. Soffront KMS comprises of Knowledge base articles, customer support articles, Solutions and more.
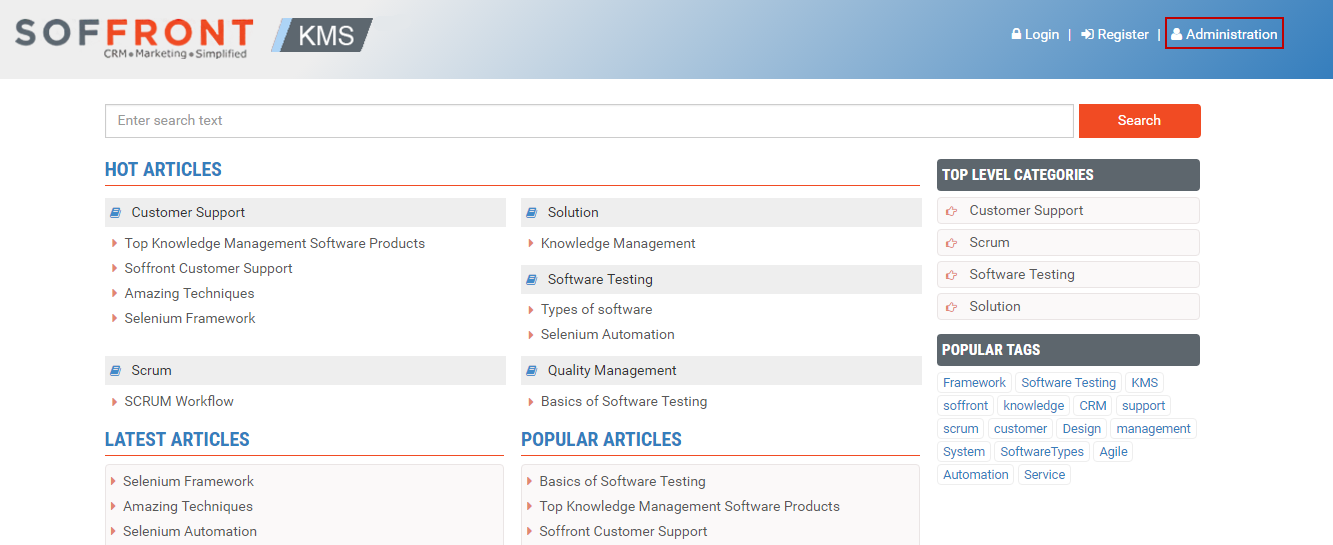
- Click on The link to open Soffront KMS login page as shown below.
2. Click on Administration to log in
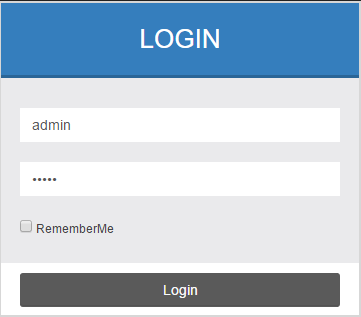
3. Type in username and password to log in
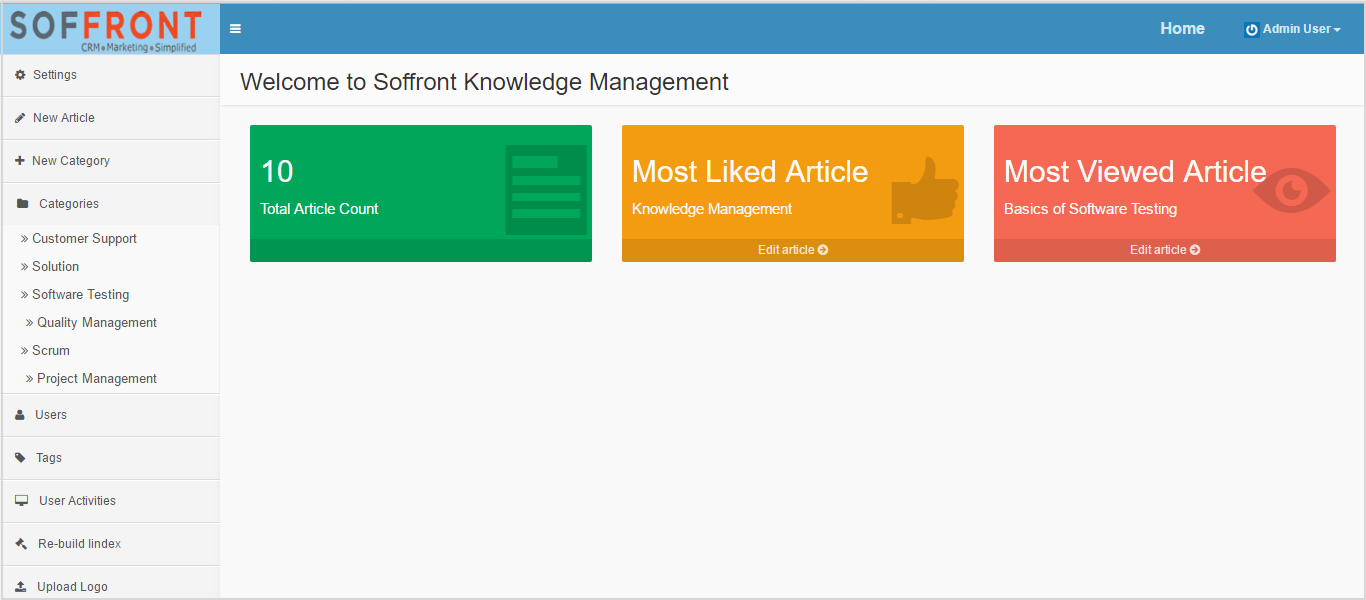
Soffront Knowledge management home page.
Setup Profile
Profile setup allows you to manage password, email address and username.
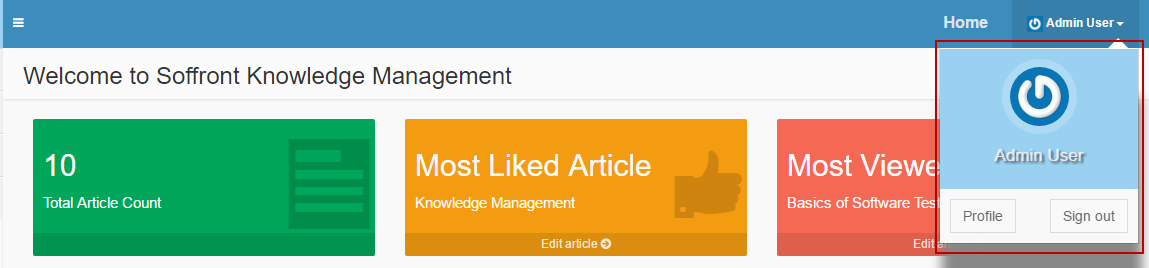
- Click on the user name on the top right hand corner to access Profile and Sign out buttons.
- Click on Profile Button to setup Admin profile
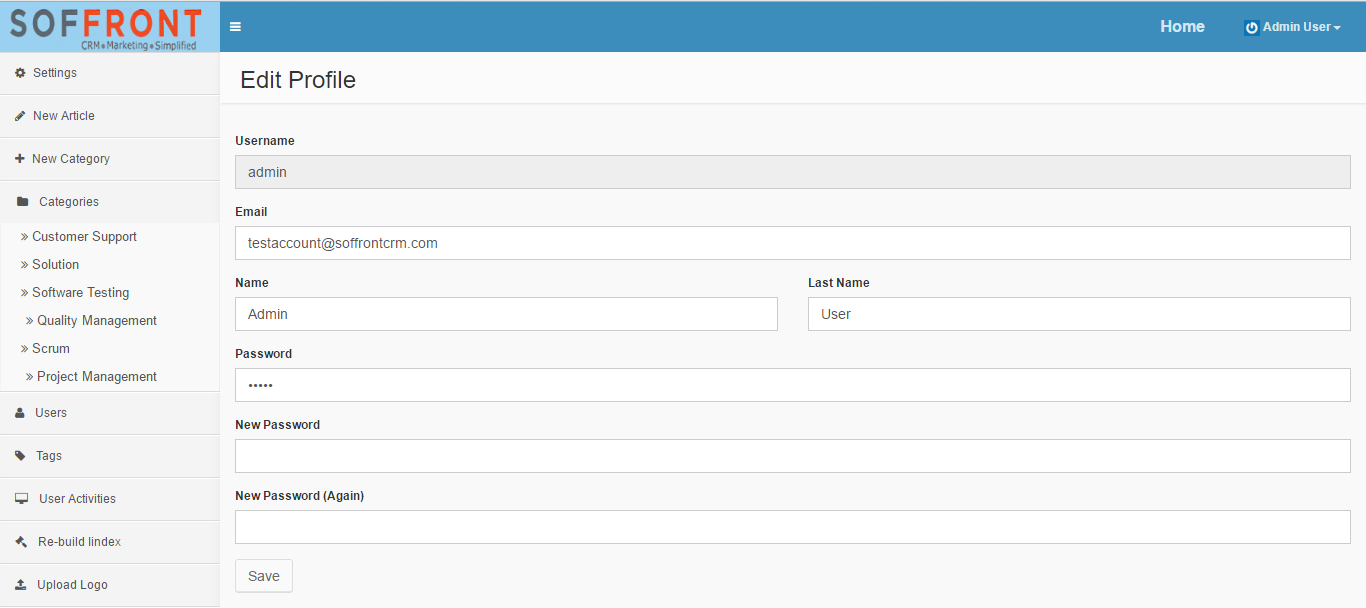
- Username: Username will show up by default
- Email : Add email address that you want to connect with the KMS
- Name: Type in First Name, this will be displayed as the profile first name
- Last Name: Type in Last Name, this will be displayed as the profile last name
- Password : Type in current password
- New Password: In case you forget or want to change current password , type in new password.
- New Password (again) : Confirm new password.
3. Click on Save to Save changes.
4. Click on  icon to make Edit Profile full page.
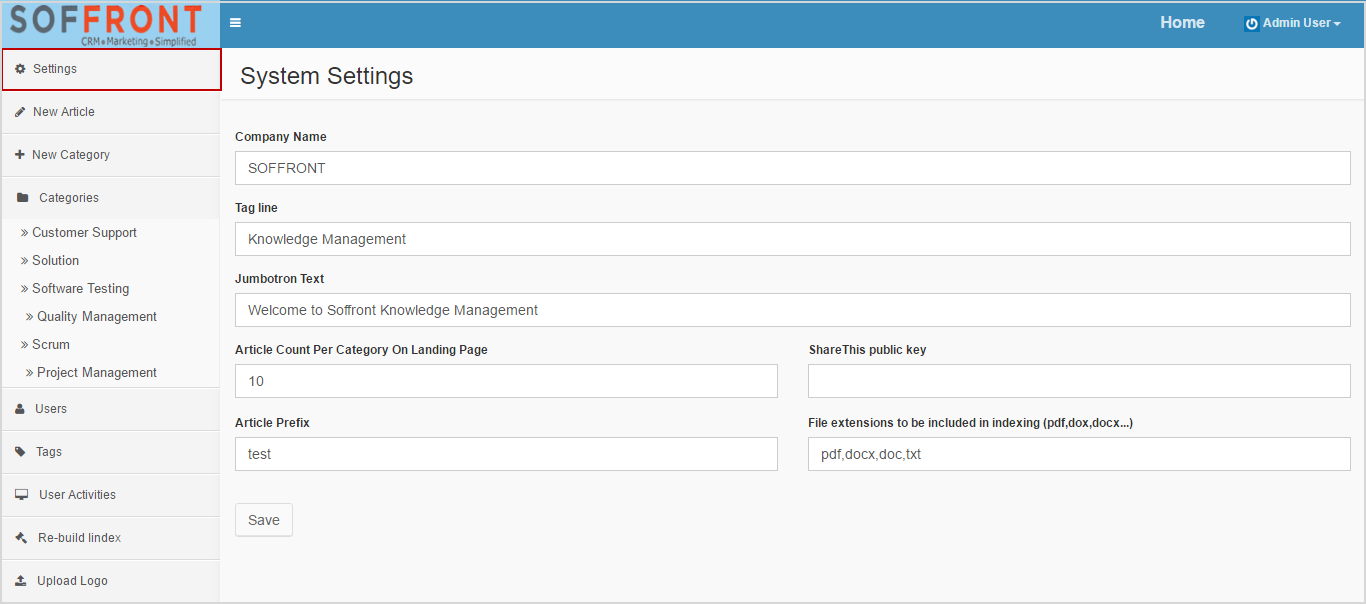
Settings
Settings helps you to setup the display and format of your KMS home page. Such as adding your company name, setting up the number of articles displayed under each category and more.
- From Administration page click on Settings to Setup your KMS format.
- Company name: The Company Name is for the name of your company or organization (this will be shown on the title bar as well as each page)
- TagLine: The Tagline can be used to define the sites name or purpose.
- Jumbotron Text: The Jumbotron Text is actually the smallest text on the Landing Page banner .
- Article Count per category on landing page: This defines how many articles are displayed on the Landing Page as well as under each Category
- Article Prefix: Put a prefix here.
- Share this Public Key: Put your ShareThis public key here (optional)
- File extensions to be included in index: Put valid file extensions of files that you may attach to KB Articles
Add New Article
Click on New Article to Add new article to your KMS.
- Category : Select article Category from the dropdown list.
- Title: Add article heading that reflects the subject of your article.
- Search Engine Friendly Name: Add words which will allow the user to find the article faster.
- Keep as Draft : Save your article as draft
- Publish Start / Publish End : Add date of publish when the article is available to user
- Tags : Type in relevant Tags, if the Tag needs a space (in this example Xbox One) then put quotes around it for example “CRM”
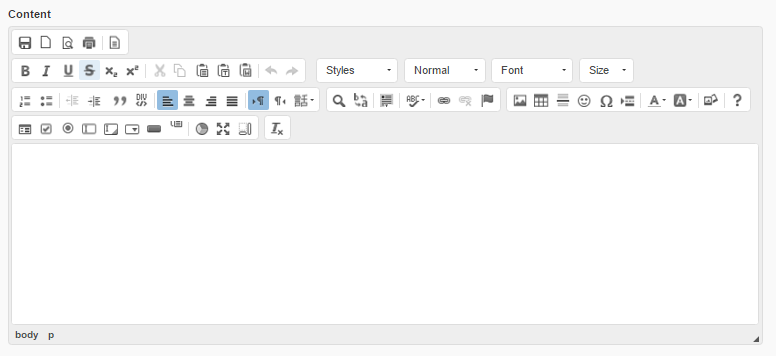
- Content : Type up the contents of your KB Article using the editing tools provided. You can copy and paste from other sources such as Word, OneNote, or another IE browser session.

The Content section has a edit toolbar very similar to Microsoft word. Which allows you to make changes to Articles, such as add style,font , text size, alignment, images and more.
Add Image
To add image to your Article follow the steps below.
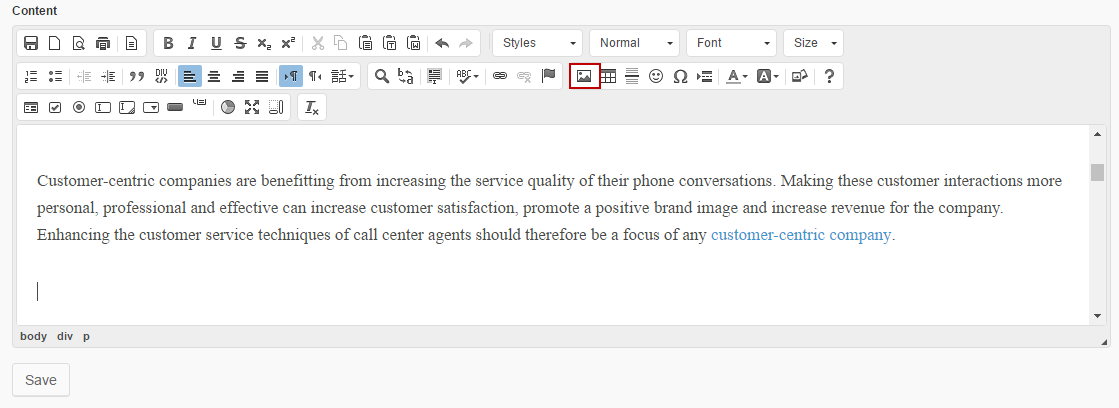
- Put your cursor where you want to add the picture to, then click on the Image icon.
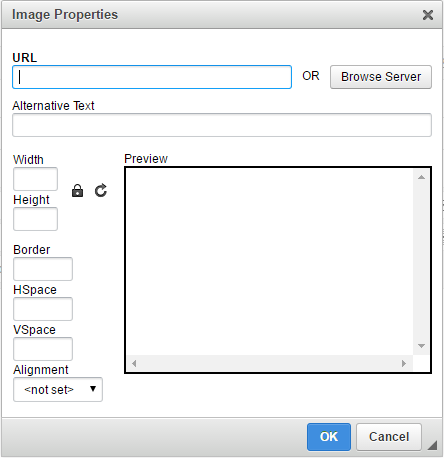
- Click on Browse Server to look for images. You can upload a image from desktop or you can select Image Gallery to use one that has been pre-loaded.
- Click on Choose File button to upload image from desktop.
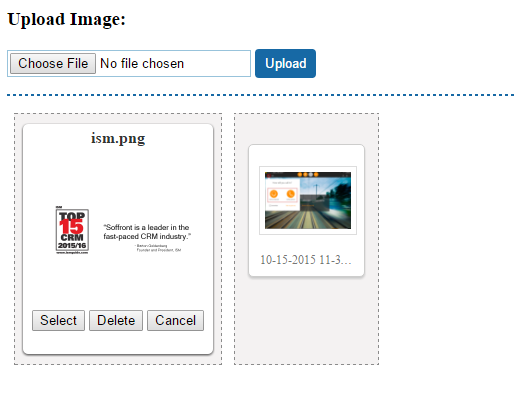
- If you already have a images added to the system, click on the image then click on Select to add it to the article.
- To adjust the size of your image, add new dimension to the width or height box , dimension ratio is locked by default, so if you change the height the with will change proportionally.
- Align the image , left ,centered or right. By default it will be added where you have specified on the article.
- Then click on Ok to add the image to your Article.
Add New Category
You can add different article catagories to your KMS which will allow you to manage and sort relevant articles under each category. Categorization of articles helps you to find them easily and keep them updated.
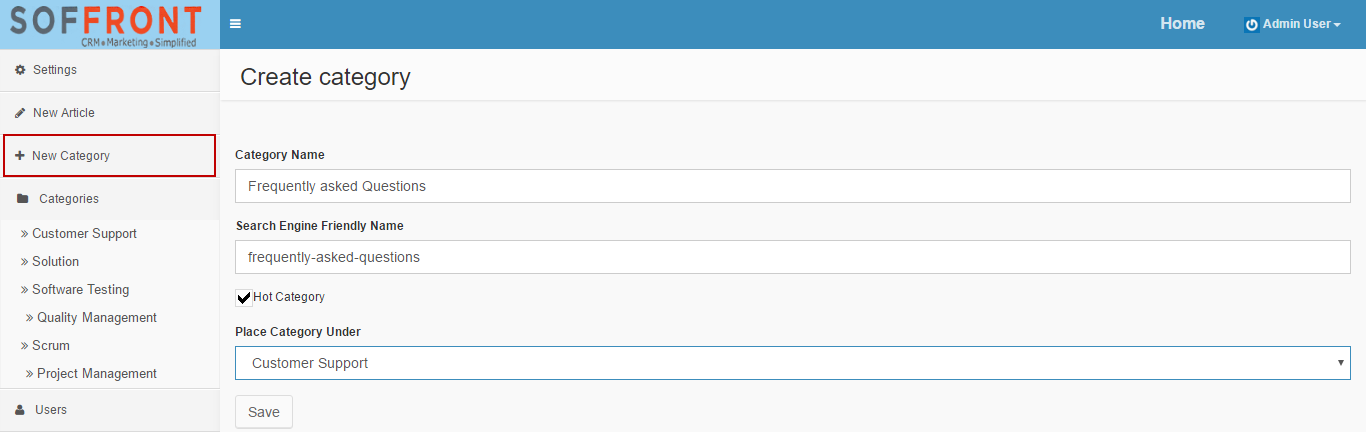
Follow the steps below to add New Category:
- Click on New Category tab.
- Category Name: Type in category name.
- Search Engine Friendly Name: Click on the field , the system will add the name by default.
- Hot Category: If the Category is to marked as Hot, then check the ‘Hot Category’ checkbox
- Place category Under: If the Category is to be a Subcategory, then use the Place Category Under dropdown to select the Parent Category ( optional)
- Save: Save changes.
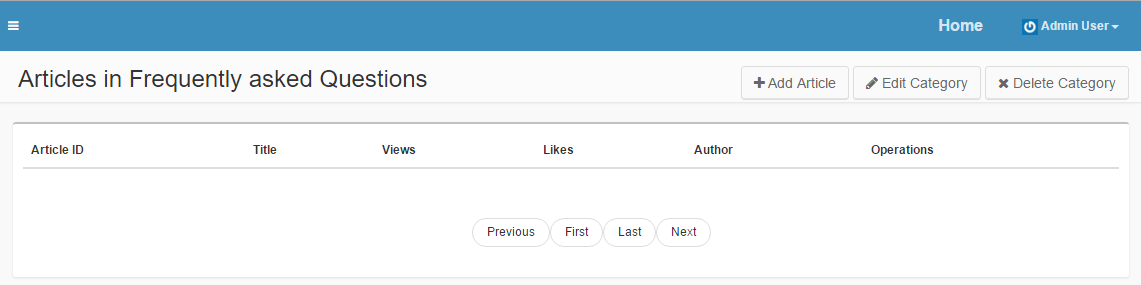
Category
The category page contains all the articles under that category. It also displays the article details such as Article ID, Their author, number of views, likes and more.
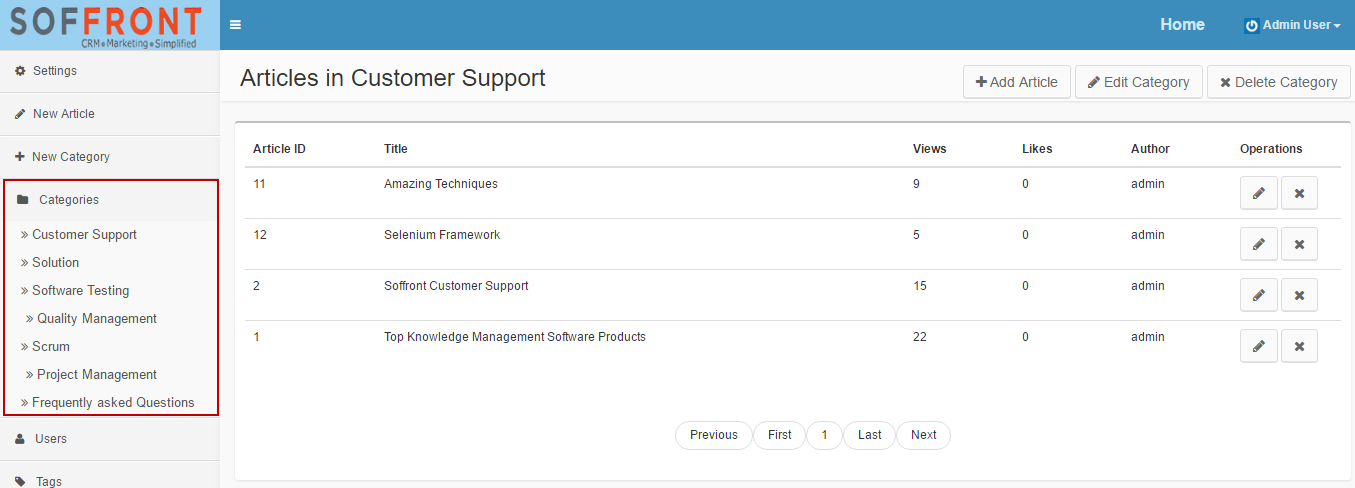
- Click on
 to add a new article under the Category.
 - Click on
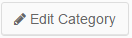 to change category details.
 - Click on
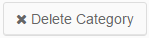 to Delete category.
 - Click on
 to edit article.
 - Click on
 to delete article.
User Management
To add a New User perform the following:
- Open the Dashboard
- Click on User from the left hand menu.
- To create a new use click on Create Users button on top right hand corner.

- Username: Fill in the Username (no spaces allowed email address are ok)
- Email: Fill in the user’s email address (optional)
- Name Last Name: Fill in the user’s First and Last Name
- Password: Type a password for the user

- Role: Using the Role dropdown box, choose the user’s Role (in this example Admin).
- Status: Select Status from the dropdown list. ( In this example Active)
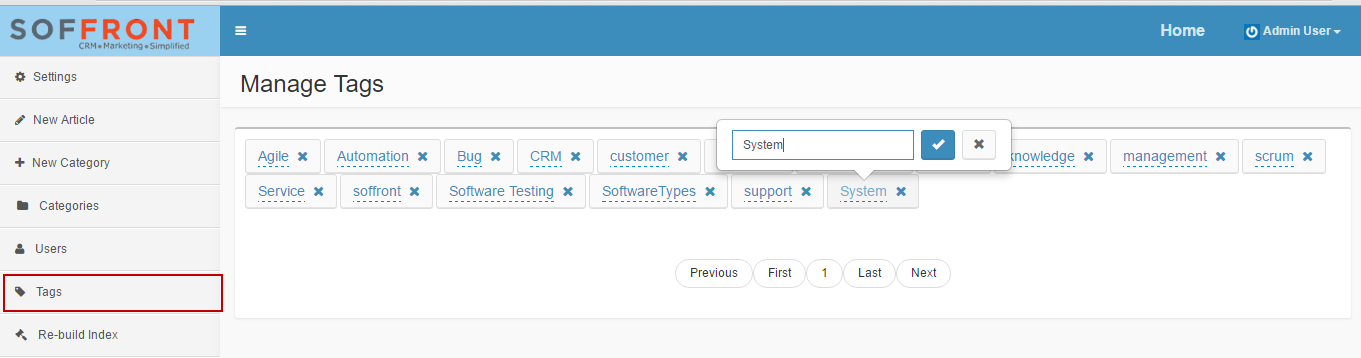
Setup Tags
You can rename or delete existing Tags in the Tags section of the Dashboard. To rename a Tag click on it and change the text then click the Checkmark. To delete a Tag simply click on the X to the right of the Tag name.
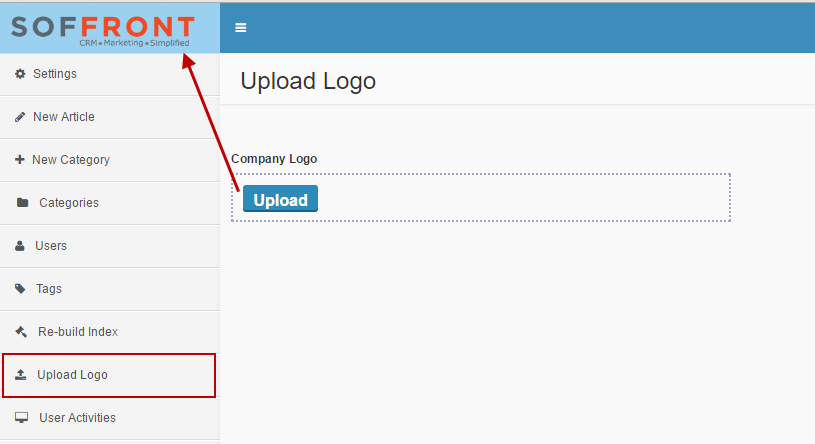
Upload Logo
Upload your companies logo. Click on Upload Logo from left hand column. Click on upload button to find and add a picture from your computer which will be displayed on the top lefthand corner of each page.
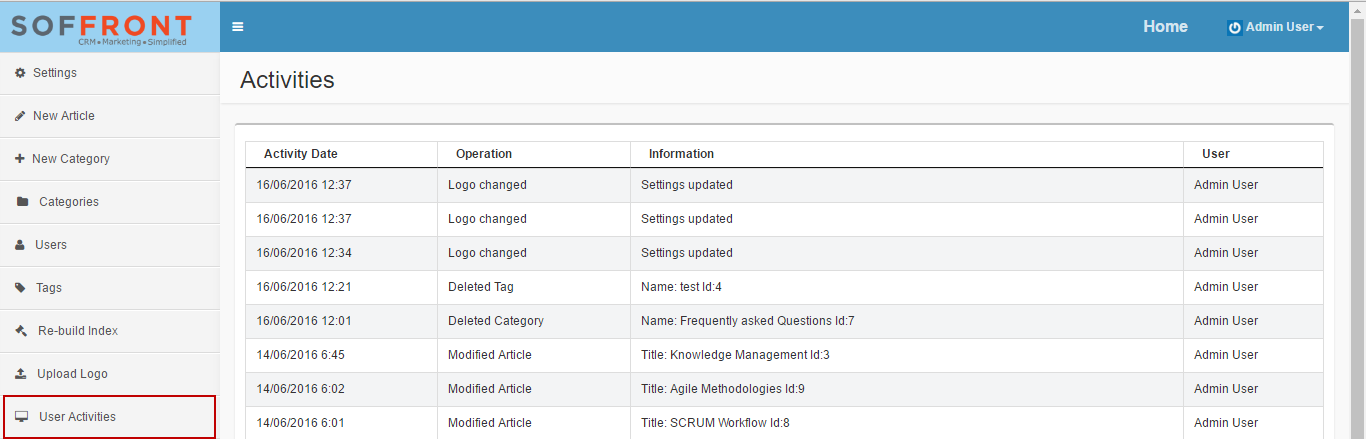
User Activities
Click on User Activities .
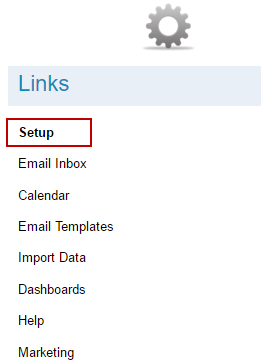
Follow The steps below to Integrate your KMS with your CRM
- On home page ,click on Setup under Links.
2. Click on Knowledge Base Setup under My Setup
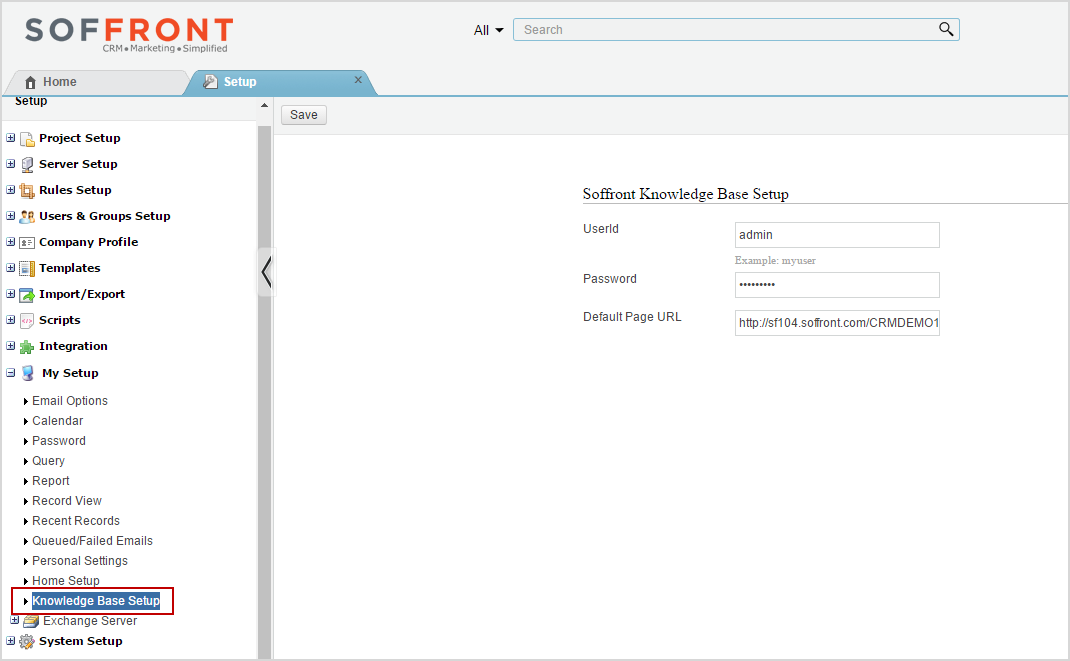
Add the details for the Soffront Knowledge Base Setup
- User Id : Type in your User id for KMS
- Password: Type in your password for KMS
- Default Page URL : Add KMS URL
- Click on Save to Save settings.
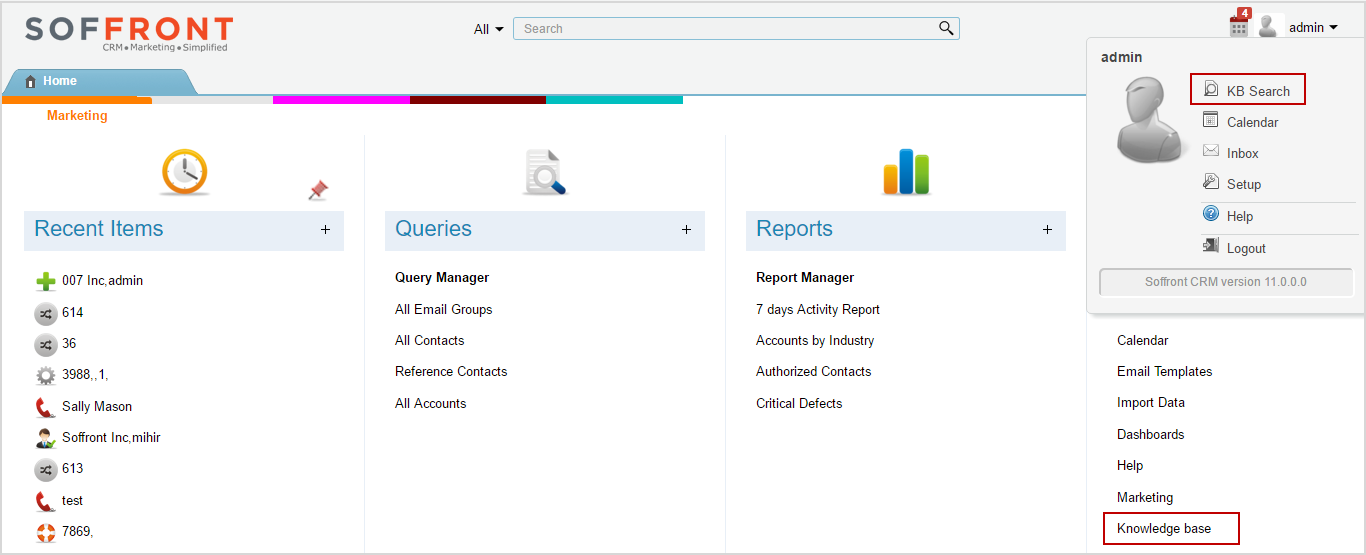
Once you set up the KMS you can access it from homepage. Click on you name on the top right hand corner to open the dropdown list. Then click on KB Search.
Note: You can also add it as a Link as shown below.
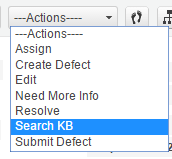
Search Tickets in Knowledgebase articles
Follow the steps below.
- Open the ticket you want to search in the KMS
- Click on the actions drop down list then click on Search KB
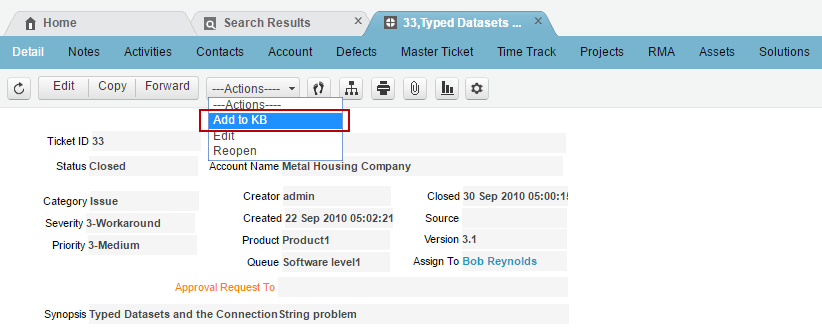
Add Solutions to Knowledge Base
You can add Solutions of the tickets to knowledge base so that it can be searched later for reference.
- Open a Ticket record with Status as Closed.
- From the dropdown click on Actions and select Add to KB.