What is KanBan and why to use?
A Kanban project board allow you to visually Plan, Execute, Monitor and Close projects while offering a convenient drag and drop task management tool for your project team.
You can create a new project and break it down into simple stages called “Status” which is represented by the Lists on the Board. Conveniently add “Tasks” and “Sub tasks” to the list and allocate “Resources” for execution of the tasks. “Priorities” for the tasks may be defined which would be indicated by a suitable color.
Assigned users can drag and drop the tasks to the appropriate list corresponding to the “Status” of the project making it very simple for manager to evaluate the project progress.
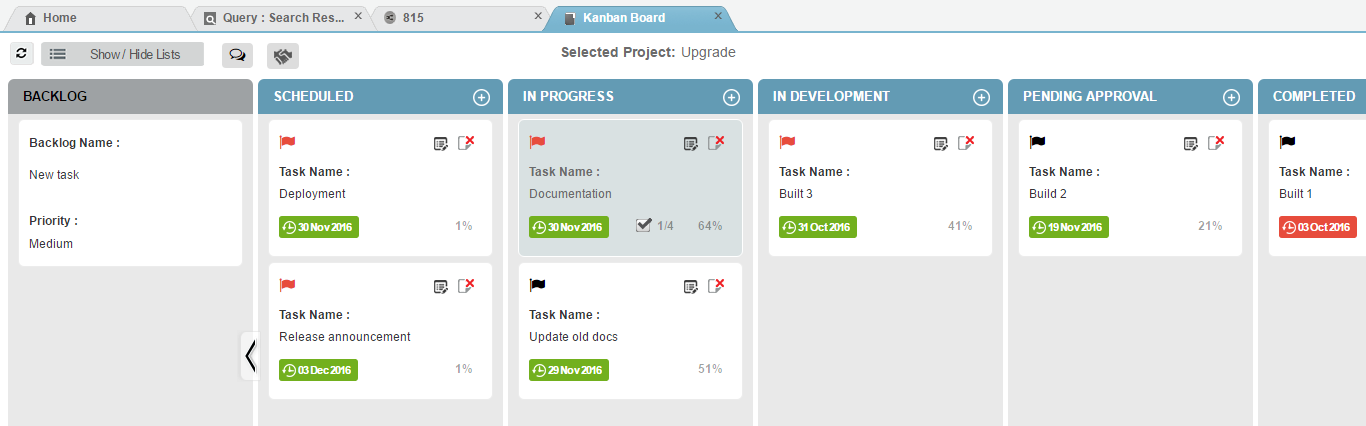
The image below shows how a project with its tasks would appear on the Soffront Kanban Board:
How to create Kanban project?
To create a project on Kanban board follow the steps below:
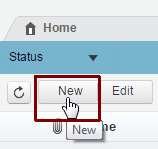
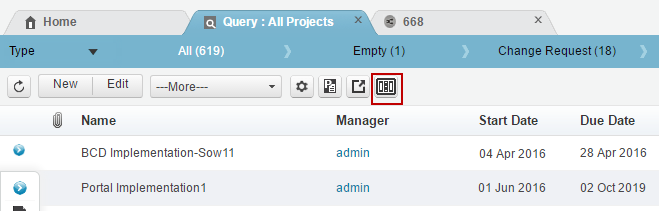
1. Click New from All Projects list view as shown in the image below:
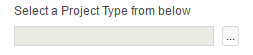
2. The New project tab appears. Click the “…” icon to select the type of the project. Refer to the image below:
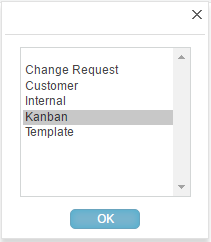
3. A pop-up appears. Select Kanban and click OK. This will make sure that the new project is created as a Kanban project and all the functionalities of a Kanban board will be applicable to the project.
Note: You can also view a project which is a non Kanban type under Kanban board, but will not be able to add tasks directly from the board.
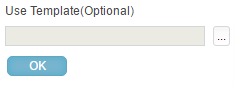
4. You can also select Project Template. Project templates are preformatted forms that you can use to create your project. Click the “…” icon to see the list of project templates.
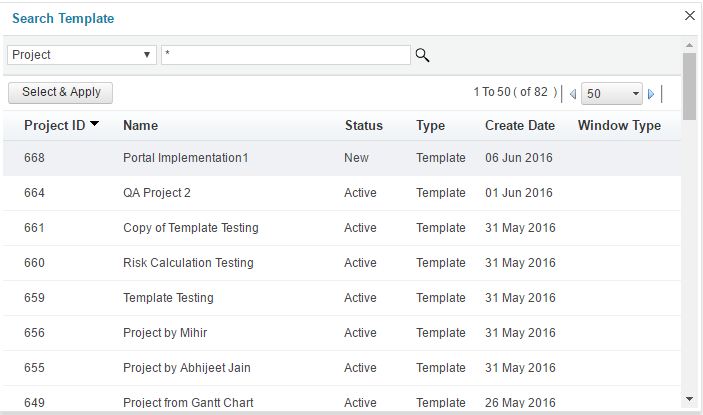
5. Search and select a template from the list, then click on Select and Apply to use the template for your project
Note: Using template is optional, if you don’t select a template, the default kanban board template will show up.
6. Click on Ok to open Project detail view page.
How and where to access Kanban board in CRM?
You can access the Kanban project board from various locations.
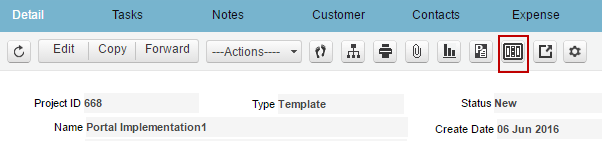
Kanban icon from project detail view:
1. Double click on a project name to see the detailed view of the project.
2. Click the Kanban icon to view the project in Kanban board. Refer to the image below:
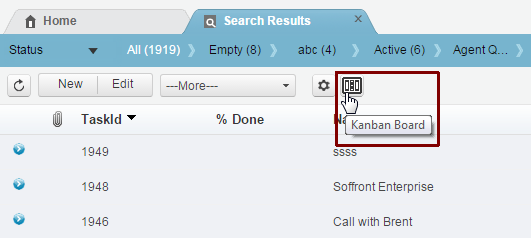
Kanban icon from project list view:
The kanban icon is also available from project list view. You can select multiple projects and click on the icon to view selected projects in kanban board.
Kanban icon from task list view:
The kanban icon is also available from task list view. You can select multiple tasks and click on the icon to view selected tasks in kanban board.
Working with Kanban
Select the lists you want to see on your Kanban board:
- Click
 to refresh kanban Board.
 - Click
 to start a text conversation with your team member. Click here for more details
 - Click on
 to start a meeting with your team member. Click here for more details
 - Click on the
 “Show/ Hide List ” button to see the list you can add to Kanban board.
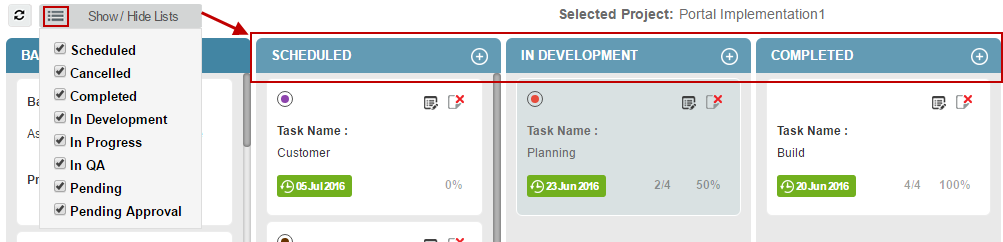
Check the box beside the list items to see then on the Kanban board.
Note: The order of the status columns can only be set by the admin users. You cannot drag set the order / sequences of the status columns.
Adding task to Kanban Board
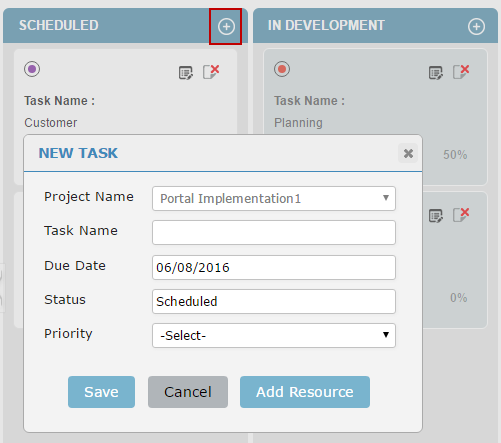
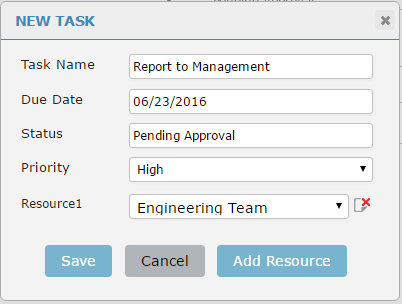
1. Create and add tasks directly from the status column. To do so click  icon on the top right corner of any column. A new pop-up will appear to enter the details of the task. Refer to the image below:
NOTE: The task addition functionality will only be available for projects which are created with projects type as “KANBAN”.
The details are:
- Project Name – Select the project name.
- Task Name – Enter the task name.
- Due Date – Set the end date to the task.
- Status – Set the status of the task. By default, it takes the status from where you are trying to create the task.
- Priority: Add task priority
- Add Resource – Click to add a resource for the task. Once clicked, a new field will appear as shown in the image below, You can add more than one resource to a task. Click on the
 icon to remove resource from the task.
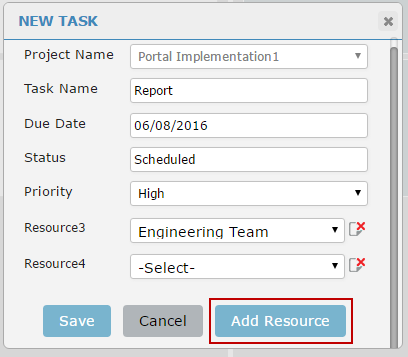
- Save – Click to save the details.
2. Once a resource is assigned to a task the initials of the resource name will be displayed on the task.
3. Click on the  icon to edit the task details and add sub Task.
5. Double click anywhere on the task box will directly open the task details page in a different tab.
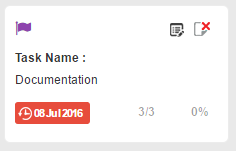
6. The Priority of the task is reflected by the colored flag on each task box.
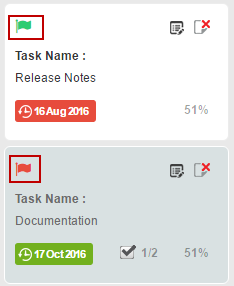
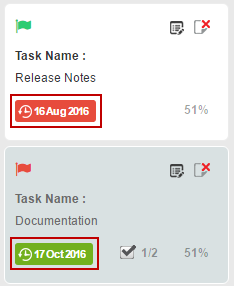
7. The date reflects the due date of the task , and the color changes from green to yellow to red as the due date comes closer.
- Green when the task due date is more than one day away.
- Yellow when the task is due in one day away.
- Red when the task is due on current date or it is Overdue up to 30 days from the Due date.
- Grey when due date is greater than 30 days Overdue.
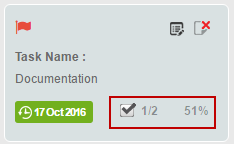
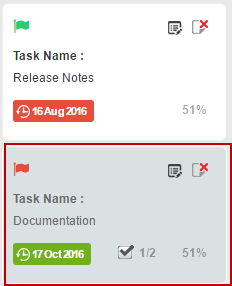
8. The number of Sub Task and the % of task completed is reflected as shown in the image below.
Edit task to add Sub task
- Click on the edit icon.
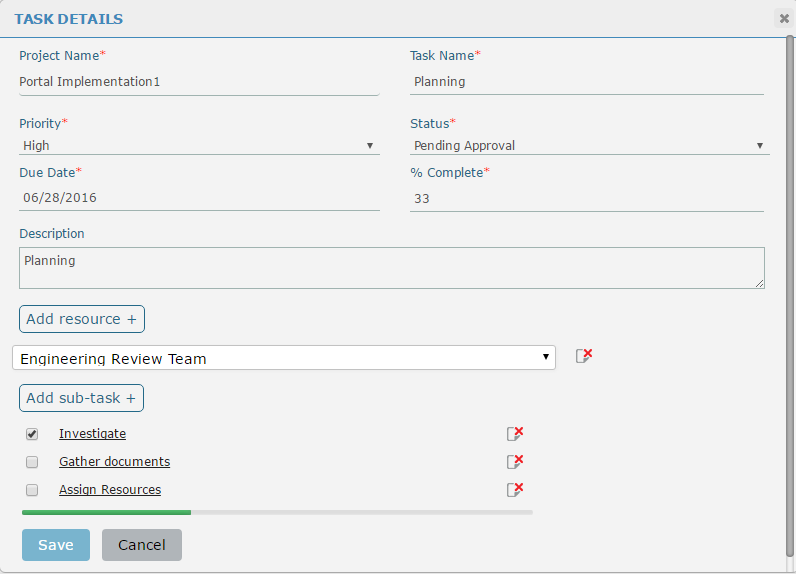
2. Click on Add Sub-Task.
- Task Name – Enter the task name.
- Due Date – Set the end date to the task.
- Status – Set the status of the task. By default, it takes the status from the list you are trying to create the task.
- Priority: Add task priority
- Add Resource – Click to add a resource for the task. Once clicked, a new field will appear as shown in the image below, You can add more than one resource to a task. Click on the icon to remove resource from the task.
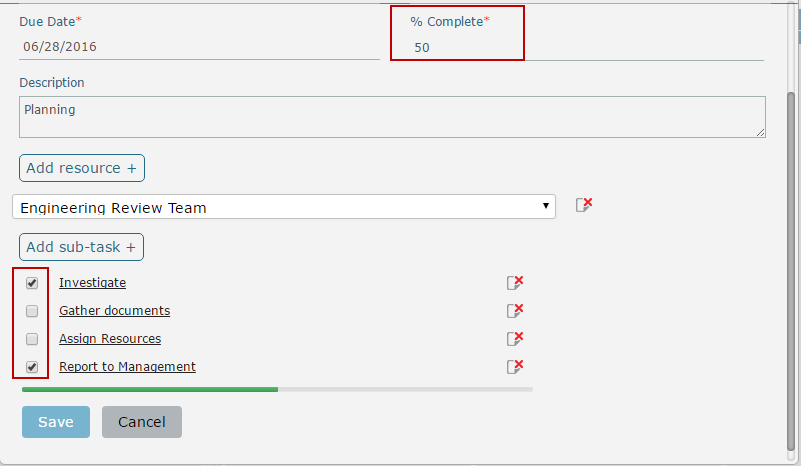
- Check the completed sub task this will show you the percentage of the task completed. For example: if you have four sub task under a task and you complete two of them then you have completed 50% of the task.
3. Any tasks which are grayed out in the kanban board represents a task which has other dependent tasks. You will not be able to move or drag and drop the task. A dependent task looks like as shown in the image below:
Note : Only the Admin will be able to move dependent task.
How to edit Kanban Board Status List
One of the restriction in Kanban board is that you will not be able to move or drag a status column to set the order of the columns. The order of the columns can only be set by the administrator users. To set the order follow the steps given below:
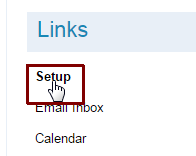
1. Click Setup as shown in the image below:
2. Under Project Setup click Forms [DHTMl].
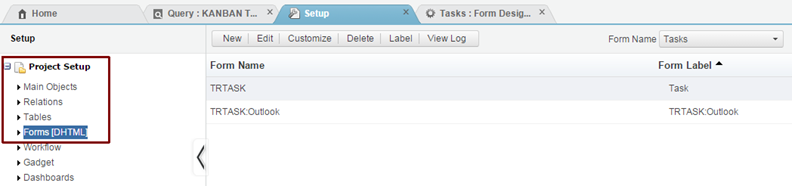
3. Select Task from the Form Name drop down list.
4. Select the TRTASK form name and click Edit.

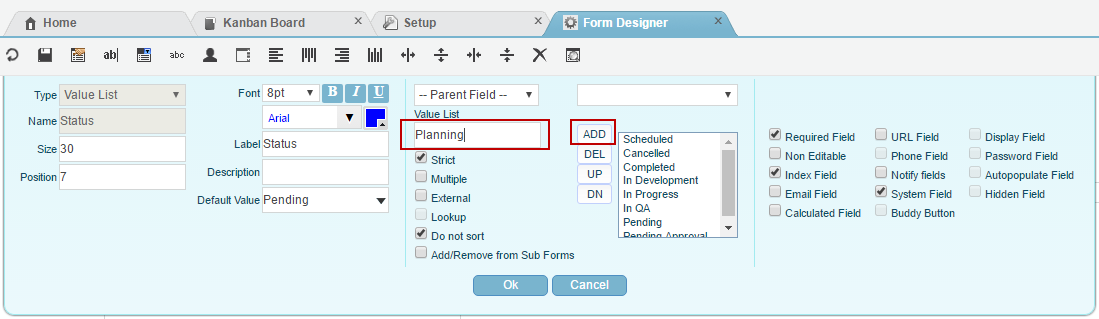
5. The Form Designer tab appears. Double click on Status.
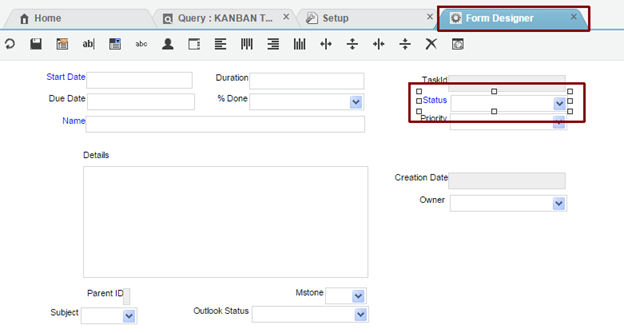
6. Select the status and click UP or DN to set the order of the status columns.
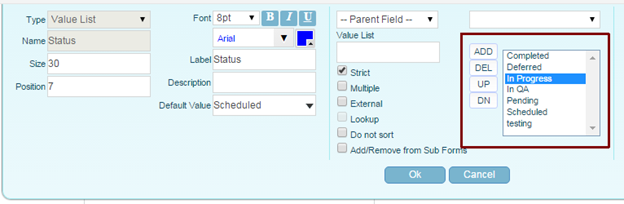
7. To add new values to the status, type in the status under Value List then click on ADD button as shown below in the image.